This is a blog post that will illustrate some of the thoughts behind the visual style and shed some light on the coloring of my medieval chest that I have been modeling and texturing over the last few weeks. I will also attach some images showing my crate in its final stages, with and without a texture.
At first I wanted to do the a textured sci-fi crate using a crate I had already created but ultimately I made the decision to go with a medieval theme because honestly, it seemed like much more fun and it’s something I wanted to try for a while now. I believe that anyone can make something look new and polished but to make something look old and withered is something that requires a bit more work and time to accomplish.
The color scheme I went with was several shades of brown to simulate old, unprocessed wood.
I went with black charred metal for the support strips lining the edges of the chest.
The reasoning behind the colors is in fact quite simple. I haven’t worked with this kind of asset before and when I thought of a medieval chest, these were the colors that came to mind.
The dominant color of my chest is a darker shade of brown, I wanted to emulate old wood that maybe hadn’t been properly oiled and finished, I wanted it to look like the wood had a rough look and feel to it, like if you touched it you would get a splinter.
The colors that I used for my chest are warm colors and they are in their full hue, there are however some areas that I chose to brighten in order to give the wood some diversity and to give it a “uneven” look.
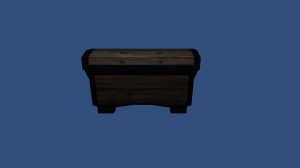
This is how my chest looks when rendered in-engine with only the basic texture applied.
What you see is the mesh and the complete diffuse texture. I have applied basic lighting and aligned the camera in order to get a nice shot of the object.
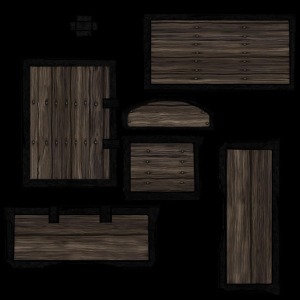
This is the final diffuse texture for my crate as seen in Photoshop, it has all the parts that will be used on the final object. The parts are all painted individually in Photoshop and then applied in 3DS Max using the UV editor. There are some things that I could have done better however, my UV’s were not packed correctly and that is why you there is so much space in between all the different parts.
When dealing with textures it is very important that you make sure that all the pieces are of relevant size and that you pack them tightly.
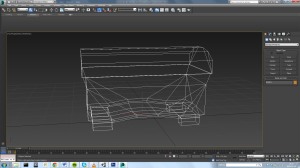
This is my final model in wireframe-mode, in 3DS Max.
The wireframe view can be useful when you want to give your model a good look and when you want to go over your final topology.

This is my final model in 3DS Max with a UV checker applied.
The UV checker is used to check and adjust the sizes of the different parts in your UV editor.
